Showing posts with label Appetizer. Show all posts

Saturday, August 23, 2014

Szechuan Chili Oil

If there is one condiment I would never share with anyone, it is chili oil.

Perhaps it is the reason why we love to go to Duck King so much, simply because the chili oil is great, if not wonderful. The best one I've had so far was at a small restaurant I used to go to when I was still doing office work. Heck it was a long time ago I already forget the name of the place and sadly it was replaced by Starbucks. Anyhow, I would refuse to go to a Chinese restaurant with average chili oil even when the dish is so stellar compared to Duck King. Chili oil makes a simple dish heavenly, I think.

I actually never bother to make my own chili oil because Duck King is only 10 minutes away from home. Not until yesterday.

My friend sent me a bunch of Szechuan peppercorn. It is quite hard to find it where I live. I have never cooked with it before, but I love the dishes that incorporate those particular peppercorns in. Having so much in my disposal, I immediately think of Mapo Tofu, Bon Bon Chicken, vegetable stir-fries, and many other Szechuan inspired dishes. But no, they have to wait far in line because Baby I am gonna make you sweat! With chili oil.


Adapted from bonappetit.com
Ingredients
Infused Oil:
1 litre vegetable oil
2-3 cinnamon sticks
1 whole garlic
3 inch ginger, the fatter the better
3 tbs coriander seeds
6 star anise
2 tbs green cardamom

Ground Chili:
225 gr dried chili
1/4-1/2 cup Szechuan peppercorns
---
3 tsp salt
3 tbs soy sauce

Directions:
-Bruise all the spices for the infused oil
-In a heavy bottomed pot, pour the oil, put the bruised ingredients in, then simmer on low heat for at least two hours.
**You want the garlic and the ginger just to fizz, not burn, not even brown.

Meanwhile...
-Place the dried chili on a pan and bake it in the oven for around 10 minutes on 150C. 
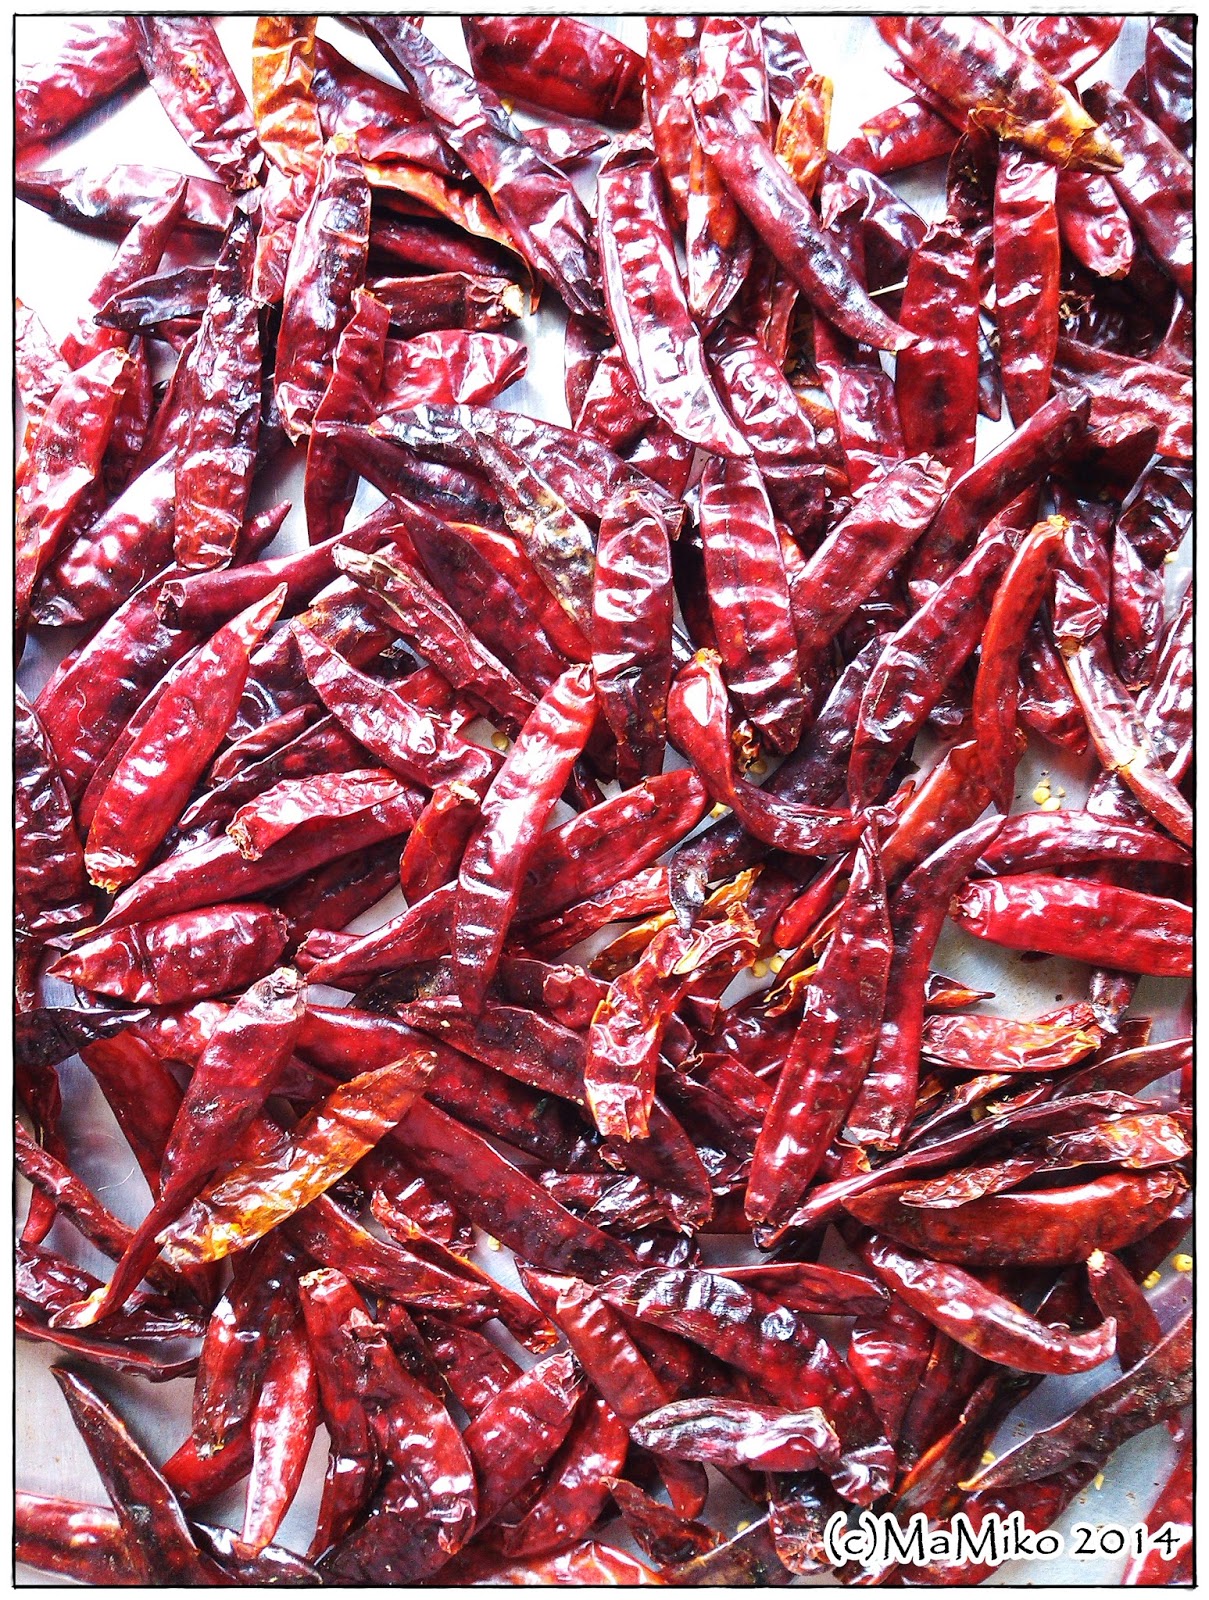

**This step is actually optional but definitely sane. If you buy your dried chili in a traditional market, chances are they do not keep it in tight container. So you wanna get rid of any ants or whatever living being lives there. It adds extra smokiness as well.
-Grind the chili and peppercorns. You don't want it to be too coarse or too fine it turns into powder.


-Place your ground chili in a big bowl, use either glass or stainless bowl, Mix the salt and soy sauce in.

After two hours.....
-Prepare a sieve
-Crank the heat up and let the ginger and the garlic furiously fizz.
-Pour the infused oil through the sieve. Be careful, it sizzles. 


Stir and let cool..


I am out of words.

It looks.. Demonic.. and judging from the time it took me to infuse the oil with that amount of spices, I'm not surprised that it is tantalizingly addictive. It is chili oil not like the one I've ever had. It has depth and character. It can even turn a humble instant noodle to a five star noodle dish. Toss it on your dumplings, on dim sum, on meat, on veggies, oh the endless possibilities!


If you're feeling crafty for the next holiday season, buy small mason jars and fill them with your own homemade Szechuan Chili Oil. Lovely gifts they would make. 

Okay, off I go now tossing some oil on poached eggs.

Have fun making it,
Amy

Stumble Upon Toolbar Pin It

Sunday, July 14, 2013

Whole Wheat Cheese Twists

I haven’t yet met any Indonesian who doesn't love crispy snacks.

We have many arrays of crispy snacks. Cheese sticks are one of the most famous snacks and has a gazillion of fans. Having said that, I am not so fond of cheese sticks. I rarely find a bag of cheese sticks that are cheesy enough to please my palate. To make the matter worse, they’re deep fried. It’s just something that spells doom to my tonsil’s well being. I can’t tolerate too much fried food. That’s why when PMS kicks in, I’m so walking the thin line between tonsillitis and bliss, courtesy of all those chips and whatever cousins they have. But still, never cheese sticks.

What makes crispy snacks so irresistible anyway? The very act of grinding the crispy food between our teeth and the crunchy sound it makes creates a certain happy sensation. I haven’t thought much about it before and I haven’t had a chance to read any scientific journals about the relation of snacking and limbic system in our brain. Surely if one of hypothalamus’ jobs is to control hunger, why is it quite difficult to stop snacking when we’re actually already full?

But that’s my homework and I shall not bother you with anything scientific except the delicious smell that would be captured by your olfactory sense when these crispy, cheesy, savory sticks come out from your oven.                  

I found the recipe at Blogher.com and told myself that I just got to make this. All of the ingredients are in the pantry. I was about to make it when my daughter asked me whether she could have it with whole wheat flour instead. Brilliant! But not only that, my little cheese loving helper also wanted to grate some gouda and put it into the batter. So what we had was a fun experiment resulting in healthy and utterly delicious crispy snacks.

Recipe:
1/2 cup whole wheat flour
1/2 cup mature cheddar cheese
3 tbs grated gouda cheese
1/4 tsp salt
1/4 tsp ground chili pepper
3 tbs cold unsalted butter
1 egg white
a pinch of dried thyme
a pinch of dried rosemary

Note:
-If your cheddar is young, use more than 1/2 cup
-If you don't have the herbs, you can use whatever suitable herbs to be paired with cheese
-Gouda can be substituted with any other hard cheese such as Parmigiano-Reggiano or Parmesan

Directions:
1. Preheat your oven to 200C
2. Mix the cheese and all the dry ingredients then toss the butter in.
3. Using your finger tips, mix the butter and flour until they resemble coarse meal.
4. Put the egg white in and knead just until it comes together.
5. Roll the dough thinly, not until filo thin though, between two sheets of silpats or baking papers
6. Cut into strips and twist.
7. Bake for 12 minutes.
8. Enjoy!

--The color won't change much after they're baked--


YUMMO!


I think this is a great example of perfect savory snacks. It's fast to make and it doesn't require you spending time washing dirty dishes and pans. How cool is that? Plus, it's very healthy and quite fulfilling. I don't see any reason why you would wait to make this. I know I can see these cheese twist as a regular in our house or just about whenever I need to unwind watching late night shows after a long day.

Happy Baking,
Amy

Stumble Upon Toolbar Pin It

Friday, March 9, 2012

Agedashi Tofu

Oh rainy days…

You are ever so wonderful and romantic.

I always love, love it when it rains. It feels as if each drop is orchestrated to help me ease my mind and let me skip reality and visit my beautiful, though rather somber and lonely, perfect world in my mind. I am a Virgo to the bone and not to max out the atmosphere I love the most would be a sad loss for me. I want to enjoy my rainy day, to savor it, to embrace it, and feel whole with it. To do that, I need to stimulate all my senses.

I have the quietness, that’s good. I open the windows wide to smell the fresh air and let the scent of water-kissed greenery permeates my living room. What I need is just something light and earthy to eat and drink.

If you know me well, I am a tofu worshipper. If I could, I would stop writing and cooking and just dwell in the art of making tofu. So for this glorious rainy day I have decided to make a tofu dish that is on my top 5 most favorite tofu dish, Agedashi Tofu.

This is basically a fried tofu with dashi sauce. I do not fry my food, but this one is an exception for its somehow not-crispy not-gooey outer skin which covers the silky soy goodness that makes this tofu dish special. I cannot get it by steaming my tofu. I mean, I have been called a no-fried food evangelist, but even an evangelist has a dark secret or two, right? Looking at the finally cooked and generously topped with katsuobushi* dish, I was glad I listened to my ‘dark’ side and fried my tofu. But I promise you I did not use too much oil and I put the tofu on paper towel  to have the oil partly absorbed. Tee hee.. 


Ingredients:

For the tofu:
-1 block of mung bean tofu or a tube of silken tofu
-Corn starch
-Oil for (deep) frying.
 
For the tentsuyu sauce:
-3/4 cup kombu dashi*
-4 tablespoons soy sauce
-2 tablespoons mirin (essential, but optional)
-sugar, to taste

Directions:
-Mix all the tentsuyu ingredients in a bowl, set aside.
-Pat dry the tofu with a paper towel, cut it to your favorable size, coat the tofu with corn starch.
-Heat the oil. Make sure it’s hot.
-Once it’s hot, fry the tofu until it turns golden.
-Put the tofu on a plate lined with paper towel to drain the excess oil.
-After the tofu is slightly warmer, put it in a small bowl, top it generously with katsuobushi (and grated daikon if you have some daikon at home), pour the sauce, and enjoy!

*Katsuobushi is dried bonito flakes
*Kombu dashi is a vegetarian stock made by boiling kombu (dried seaweed) in water. Just like that.
However, you can use any Japanese homemade dashi if you like.
Katsuobushi and kombu can be purchased now in big supermarkets so there is no need to go to a Japanese grocery store. Oh, if you find yourself too lazy to make the tentsuyu sauce, you can always purchase the bottled one. Another tip from me is, always be bold with seasoning. If you think you need more mirin and sugar, so put more! A tablespoon or two of sake would also add a lovely touch to your tentsuyu.

So there you have it, a simple, humble, earthy dish that would take you back in time and complete your beautiful mind. Have a cup of hot ocha to accompany you enjoy the sound of rain and not so distant thunder. And trust me, sometimes loneliness is meant to be savored. 


Stumble Upon Toolbar Pin It

Sunday, January 29, 2012

Blue Cheese Popovers

It has been quite a long time since I posted something on my blog. Busy would be my excuse despite how cliché it sounds.  The new year has brought so many fine ideas and must resolve resolutions. Among those resolutions, making homemade bread is one of the top three resolutions while the other two are better time management and drink papaya leaf juice regularly which I would, I would do it.. when.. if.. Oh you know how we love to make excuses to ourselves:)

So, I have been busy learning to make bread because of the simple reason that my family loves bread. We are bread eater. We love the smell of the fresh loaf coming out of the oven. There is a certain romance in eating warm bread. So I embarked on a journey of mastering bread baking, I read books about the history of bread, the science behind baking bread, up to the species of wheat, and where they are grown. I know I have strayed too far from my first goal which is simply to make my own bread. But being a virgo, I strive for perfection (and Peter Reinhart’s Artisan Bread Everyday book is excruciatingly hard to put down). I have tried many, many bread recipes. Some worked out incredibly well, some did not but still tasted good. Please note that did not do well means the bread did not look as presentable as I expected, not that it was a total failure. I will post my progress once I manage to organize the recipes and the pictures.

A week ago, it was a cold and rainy Saturday morning and both my hubby and Amiko were still sleeping. I wanted to make some bread for them but I was kind of down with flu and the last thing I needed was to waste my strength on kneading bread. Besides, I was thinking of something savory yet light to eat for breakfast. So I decided to not bake bread but to bake something I never baked before. After a quick search in The Joy of Cooking book, I found a recipe for popovers. It is a simple recipe, does not require many ingredients, and easily tailored to suit our taste and preference.


Preheat the oven to 225C
Makes 24 mini popovers or 12 regular popovers.

Ingredients:

-1/2 cup flour
-1/2 cup wheat flour
-1/2 tsp salt
-2 eggs
-1 ¼ cup low fat milk
-1 tbs melted butter
-75 gr Danish Blue Cheese, diced
- 75 gr Old Cheddar Cheese, grated

Directions:

-Mix all the flour and salt, set aside
-Beat the eggs and combine the eggs in a bowl with milk and melted butter.
-Fold the flour until just blended, a few lumps may remain.
-Spray the muffin tins with oil, you can use either regular sized or minis.
-Fill a quarter of the tin with the batter; put the cheese (I don’t mix my cheese, I made 12 popovers with blue cheese and another 12 with cheddar) and fill with the batter until full.
-Bake at 225C for 15 minutes then reduce the heat to 175C and bake for another 20 minutes, until well browned.
-Turn off the oven; leave the popovers for an extra 10-15 minutes for extra crispness before taking them out or you can serve them right away. If you can wait, that is.
-Serve immediately.

A few notes on making popovers, NEVER open the oven door to avoid deflating the popovers and do be creative with the filling. You can use all purpose flour if you do not have wheat flour. In fact, the original recipe actually calls for all purpose flour. I use wheat flour for the extra fiber and the nutty, earthy taste. Please do not be discouraged with the words ‘Danish Blue Cheese’. I just happen to like it a lot and there were still some in the fridge. I reckoned that it would be better to use it instead having my daughter sneaking up now and then nibbling it like a silly chubby mouse.

A few yummy fillings that I have tried to replace the cheese:
-Milk or dark chocolate chips.
-Basil pesto sauce.
-Sundried tomatoes.
-Apple Sauce.
-Smoked beef.
-Or just have it plain! They are delicious just as it is.


I hope you would try this exciting recipe. Why exciting? Like the name stated, the batter literally pops, though puffs would be a better way to describe it. It was like watching the instant microwave popcorn bag puffed from a flat paper to a blissful big pillow! Your family will enjoy it a lot. I guarantee it. No money back policy, unfortunately.

Anyhow, I better get back on my bread quest. My regards to your loved one and your pets, I wish you happy days ahead!


Stumble Upon Toolbar Pin It

Monday, June 6, 2011

Healthy Gyoza


These healthy melt-in-your-mouth gyoza is MaMiko's best selling food. It is 100% halal and made from the freshest vegetable, skinless chicken breast, and shrimp. No, these are not fried so it is is good for your heart J
It is sold per-box and each box contains 20 pcs.
-Cooked gyoza IDR65.000/box
-Frozen gyoza IDR60.000/box
min. order 2 boxes Stumble Upon Toolbar Pin It