Showing posts with label Desserts. Show all posts

Monday, May 5, 2014

Flaxmond Oreo Spread

No, you did not read it wrong.

There is an actual store bought Oreo here. I mean, I can go all the way to make my Oreo from scratch but that, my friend, is a task for another day. There is always another day to be crafty in the kitchen. Just not now when Jakarta’s heat is merciless and you just can’t help to wonder how it actually feels to rub those ice cubes on your chest like a cheesy early 90s ad only to realize you hate to wet your clothes.

I came across something called Oreo Butter a couple months ago. That is a pit, a bottomless pitch black pit, or a trench in the abyss if you would like me to exaggerate it, that you would like to jump into. It is basically a bread spread made by putting Oreo in a food processor and some oil to form a spreadable paste.

Have I tried it? Yes.

Is it good? Like hell.

Spread it on bread and you will instantly feel like a rebel without a cause.

The thing is, it is not something you wanna give your family. It is something you wanna keep for yourself when the going gets tough and you need a friend to be with you when you get the tough going. Is there any way to enjoy it without guilt? Of course. I found some people who are boosting their daily protein intake use peanuts in the making of the spread. Like this Oreo peanut Butter from Crazy for Crust. So I have this great idea of taking a step further and making a spread that is filled with powerhouse ingredients that still has Oreo in it.


~Toss a good amount of almonds and organic golden flax seeds!

Almonds are high in monounsaturated fats which can reduce the risk of heart disease. It is high in vitamin E, magnesium, potassium, and many other beneficial nutrients. Mixed with flax seeds which is crazily high in omega-3, you have a powerhouse combo!

Do not worry if you do not have flax seeds, you can use all almond in this recipe. Just make sure you use almonds with skins, not blanched. Because almond skins are a good source of pectin and dietary fiber that can serve as food for healthy gut bacteria in your tummy. Healthy digestive system equals healthy immune system.

Recipe:
1 cup toasted almonds
1/2 cup flax seeds
10 Oreo
3-5 tbs olive oil

Directions:
Blend it in your blender or food processor. That's it.


Now look at that glossy, spread. And it's black! Everything is sexier in black.

It would be kinder to your blender if you crush your oreo and grind your almond first if your blender is an old school blender like mine. But if you have a state of the art blender, work it!

Apart from using it as a spread for your bread, you can also use it as a dip for fresh fruits. I'm doing justice to healthy eating here. So if you have small kids, this spread can be a good idea to be served next to their fruit platter. 


Yeah, it is also a good idea to feed your kids fruit and leave the crackers all for the parents. God! This! With crackers and binge watching on your favorite tv show is heaven. Be forewarned though, you will find yourself licking the spoon and the blender blade and the blender glass after you make this.

Stay healthy,
Amy

Stumble Upon Toolbar Pin It

Tuesday, April 15, 2014

Homemade Yogurt

Would you like to have a bowl of silky yogurt topped with avocado slices, chopped almonds, and drizzled with honey?


I know I do.
I know I want it for breakfast, snack, and dinner if I feel like eating light.

But I can't spend that much money just for yogurt. I know it's healthy, though.

What to do? Make it at home.

I’ve been meaning to write about how to make homemade yogurt since last year. Alas, the road to my computer is blocked by heaps of books begging to be read. So it isn’t my entire fault, you see. I've tried.

With prices skyrocketing, I am forced to do many DIY projects. It’s a good thing actually. So whatever the future brings, the simple, sustainable lifestyle we’ve been living should help us get through many things. Why pay for simple indulgence if you can make it by yourself?
  • A tub of 500gr good quality plain (greek) yogurt, store bought, cost 4$
  • A tub of 1kg good quality plain (greek) yogurt, homemade, cost 1.5$
That’s my rough calculation. But that simple math should make you want to start making homemade yogurt especially if it is a staple in your everyday meal and cooking.

Essential tools for yogurt making:
-Thermometer
-Stock Pot (minimum 1.5L)
-Spatula
-Glass jar(s)

Ingredients:
1 Litre of PASTEURIZED milk. Not UHT.
1 cup of good quality plain (greek) yogurt.
2-3 tbs milk powder (optional)

Directions:
-Have all of the ingredients in room temperature.
-Heat the milk on medium heat, while stirring, until it reaches 85C.
-When it has reached 85C, remove the pot from the stove
-Let the milk cool in the pot until it is down to 38C
-Meanwhile, sterilize and dry the jars. You can use big Ball jar, or you can use ex-jam jars you have at home. They will all do.
-Mix the milk powder into the cooling milk, make sure there’s no lump.
-Once the milk has cooled to 38C, stir your 1 cup of room temperature yogurt in. Stir the yogurt before you put it in the milk so it would be easier to avoid lumps.
-Pour your milk-yogurt mixture in to the prepared jar(s) and close the lid(s).
-Place it in a warm place and leave it untouched for 8-12 hours to let the bacteria multiply.
-Refrigerate it right away
-Enjoy it plain or have it with toppings!


Important notes, tips, and reminders
-The use of milk powder is to thicken the yogurt, feel free to omit if you want thinner consistency.
-Ideas of warm places: On your refrigerator, next to your rice cooker, next to your slow cooker, inside your oven with the light on, your embrace.
-Do not temper with the yogurt until it’s fully chilled in the refrigerator.
-Keep 1cup of your homemade yogurt for making another batch of yogurt next time.
-This homemade yogurt must always be refrigerated and it is best consumed within 2 weeks.

Now if you have the luxury of owning a yogurt maker, you still have to follow the cooking steps. A yogurt maker is actually a warmer just like a baby food/milk warmer. You put your milk-yogurt mixture in the yogurt maker and the machine keeps it warm by generating a low heat. It isn’t a tool for making yogurt instantly. Do not be fooled. It does, I admit, help a lot. I recently purchased one and I have to say that it is the best kitchen gadget I own next to my ice cream maker. It’s cheap and consumes only 25Watt of electricity. With a steady heat like that, it takes me only 7 hours to finish the yogurt before it’s refrigerated.

Don't be discouraged to make yogurt without yogurt maker. Just find a warm spot in your house and your very own lactobacillus farm is good to go. 

Stay healthy,
Amy

Stumble Upon Toolbar Pin It

Thursday, November 1, 2012

Apple Oat Bar


I was asked by some of my customers to make some healthy brownies. I refer them to my Seriously Healthy Brownies. Some just love the uber dark chocolatey taste, though of course it is very dense because it contains no yolk and absolutely no butter, some are just still craving for fudgier brownies.

So I came up with a whole new recipe. It has all the texture real brownies should have but with lots of health bonus; Apple Oat Bar. It is actually supposed to be called a bar, not brownies, because it does not contain any chocolate. But since it has been receiving warm reviews from people who tried it and they just keep saying brownies, I'd say you can just call it: YUMJ


They are fudgy, just the right density, and has a crackly sweet top that just melts right away in the mouth. The oat makes gives it a surprising chewiness here and there and a hint of cinnamon compliments the apple.


Size:30x10cm

Buy 1 Rp90.000/box
Buy 2 Rp80.000/box

Have this delicious treat delivered right to your doorstep.
Call/text 081.219219139
BB Pin is given by request.

Stumble Upon Toolbar Pin It

Monday, October 8, 2012

10 Minutes ChocoFu Mousse


Being an elementary student in Indonesia is not an easy task. The long hours at school are so tiresome for the little darlings. Amiko is pretty lucky that her school isn't a school that gives tons of homeworks to its students. In fact, there is no homework at all. But still, for a second grader, a 7 to 3 schedule does give her a serious mood swings every now and then. Complaining about Indonesian curriculum is like talking to Patrick Star minus his comical features we all love. Nothing gets through. Then again, if I got by, I'm sure Amiko will get by also.

To make her happy when she gets home, I always do what my mom did back when was a kid; make sure there is a special treat no matter how simple it is. It did make me excited when I got home. All the problems at school, from mean friends to a teacher we all disliked, seemed to evaporate to thin air over a scrumptious treat mom made me. Girls, good food, a heart to heart conversation aka gossip; a perfect mood booster, methinks.

Here is a recipe, well —it is not exactly a recipe since all you have to do is melt some chocolate and press the blender button— that will actually make you feel intensely happy. Intensely happy because it is so very chocolatey and intensely happy knowing that it is by no means will make you fat. Oh, intensely happy that you only need 3 ingredients and 10 minutes, even less, to whip it up. This recipe is inspired by Cherry Chocolate Mousse Pie by Fat Free Vegan Blog. You can follow the original recipe to make the pie, if you feel like having pie. But as much as I love pies, there are days that I simply don't wanna be bothered by meticulous cooking. 


Ingredients:

Makes 3 servings.

Mousse:
140 grams dark cooking chocolate, melted
180 grams natural silken tofu, no added egg, not flavored
1/2 tsp vanilla
*For mommies and daddies: 1 tbs brandy or rum... yum yum:)

Topping:
10 fresh strawberries, washed and hulled
1 tbs balsamic vinegar
1 1/2 tbs granulated sugar

Methods:
-Melt the chocolate on the double boiler
-Put the tofu and vanilla in the blender and blend until smooth
-Pour the melted chocolate (and the brandy or rum)
-Pour the mixture in serving glasses and refrigerate at least 4hours
-30minutes before serving, chopped the strawberries, mix with balsamic vinegar and sugar. Reserve in the refrigerator.
-Serve the mousse with the balsamic strawberries spooned on top.

What?

Tofu?

Are you kidding me?

No. I kid you not. If I can trick my husband into eating this, so can you. Hmm, that statement really does not represent the whole me as a woman. But seriously, this mousse is so rich and yes, there is a hint of soy in it. Do not think of fried tofu, sapo, or mapo tofu when you hear the word tofu. Yes, it uses the same silken tofu but it yields a completely different result. It's like  chocolate soy milk only 10 times richer and creamier, bordering on ice cream. 

It is THAT good.

The problem with people and recipes is that no matter how easy the recipe is, there will always be one ingredient, or many times more than one, that will hold them back from going to the shop to purchase it then to the kitchen to cook it. I have a feeling that some would be drawn back because of the balsamic vinegar. Worry not, you can substitute the balsamic strawberry topping with any fruits that you like and skip the balsamic vinegar entirely. Blueberries, raspberries, mango, and peach are some of the best paired fruits for this lovely dessert.

A bit of chocolate a day, keeps a family happy.

Enjoy the busy bee day!


Stumble Upon Toolbar Pin It

Thursday, October 4, 2012

Light PB-Oreo Cheesecake


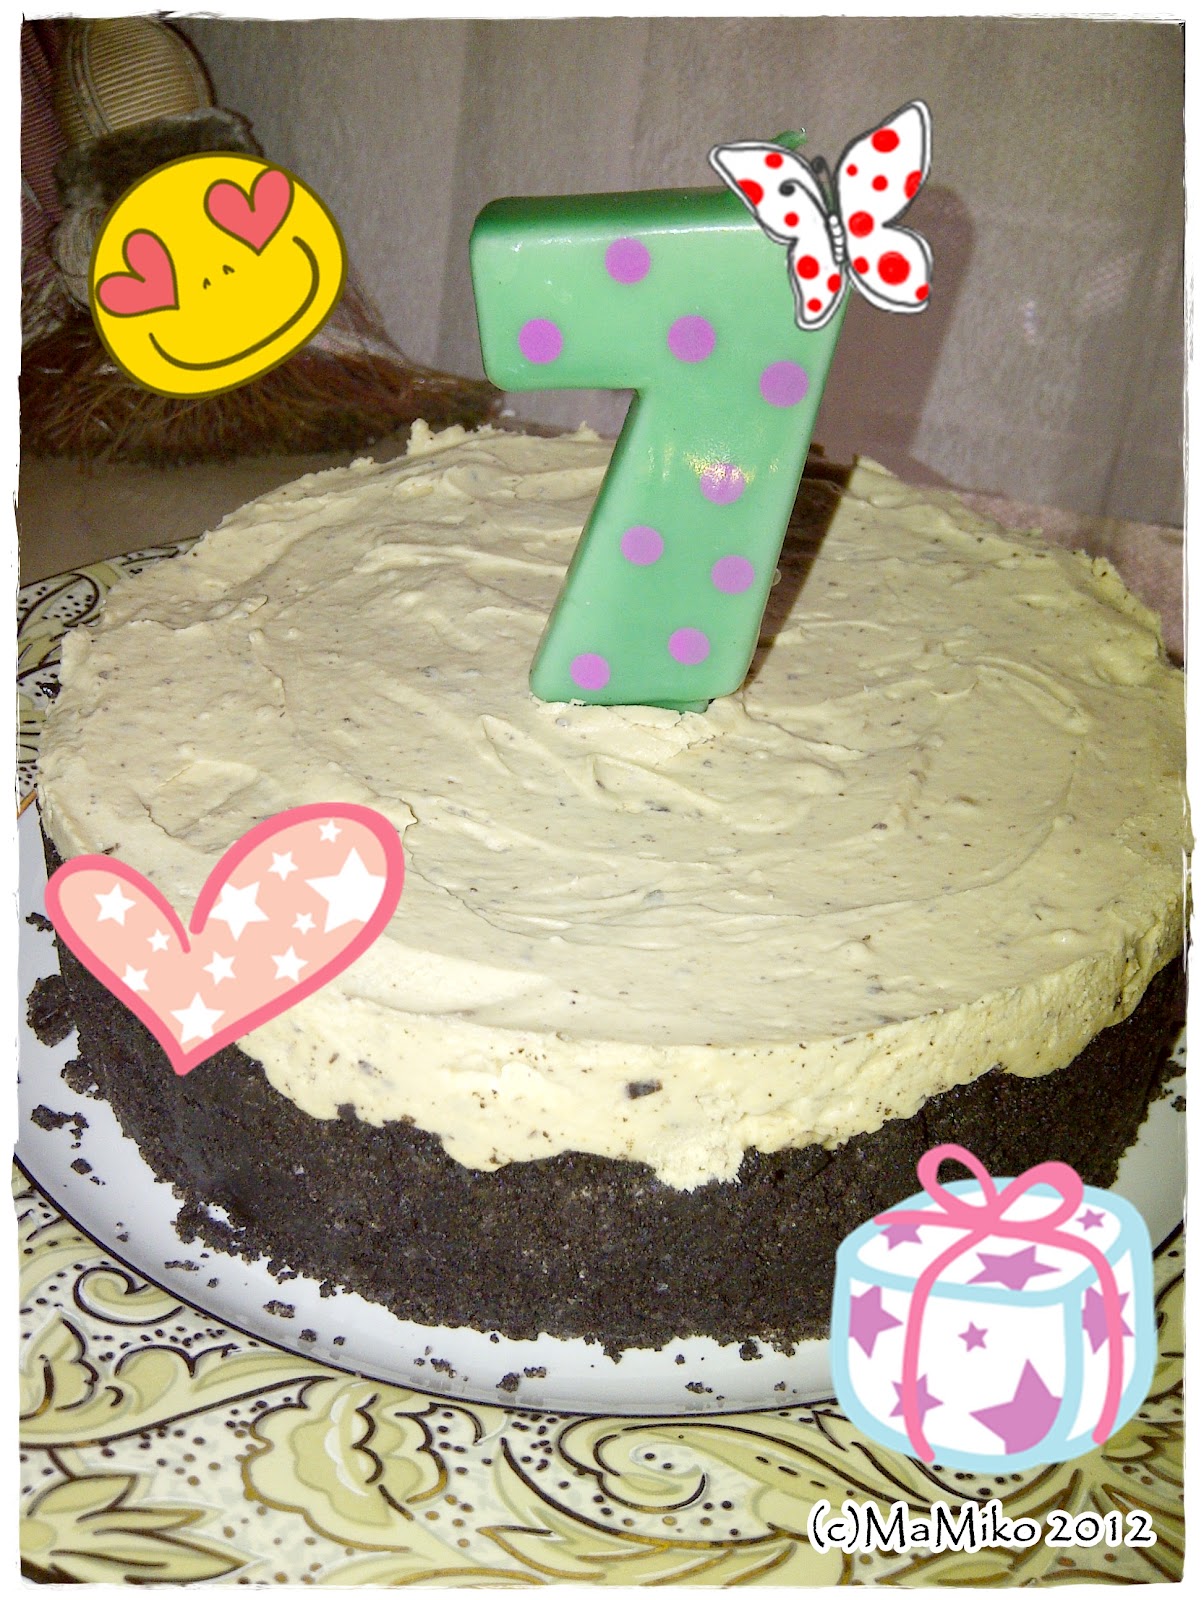
Today my little boo, Amiko Nashita Lumi, turned 7.


Boy, the hype of the birthday has been going on since September. She crossed each date on the calendar and her grin grew bigger and bigger even Cheshire would be ashamed of his. She was busy browsing for her birthday cake recipes even though I have lots of cookbooks at home, saying that by browsing, she could see people’s comments about the recipe. How she sounds like an old lady. Pages after pages, blog after blog, we came across a recipe called Chocolate Peanut Butter Torte by Browneyedbaker taken from the book Baking: From My Home To Yours by Dorie Greenspan.

To be frank, I am not a fan of any torte. Torte with its multi-layered sponges and oftenly too rich of a texture and filling is rather too heavy for me and even a cake monster like Amiko.  But reading the recipe and seeing there isn’t any layering required, the recipe looks more like a simple cheesecake recipe, providing I make a serious alteration here and there to the rich recipe. I am intrigued. Who can resist peanut butter and oreo combination? Nobody. Unless he or she is from planet uptight and no-fun.

This recipe calls for very minimum ingredients which yield maximum deliciousness. The original recipe calls for a 9 inch springform pan and mine is for a 7 inch pan. So, do not attempt to make it in a larger pan if you do not double the recipe.  I use my cool Kaiser spill-proof 7 inch springform pan to make cheesecake and other high fat cakes because any size larger than that would mean to much fat intake, which is bad because then I would have more unpaid debt of jogging to my unused running shoes.

So here is my less ‘sinful’ recipe:

Ingredients:

¼ cups finely chopped salted peanuts
½ tsp instant espresso powder (or finely ground instant coffee)
¼ tsp ground cinnamon
¼ tsp freshly grated nutmeg
¼ cup finely chopped semisweet chocolate
15 Oreo cookies, throw the filling except for 5 cookies, finely crushed.
2 tbs salted butter, melted and cooled
1 cup non-dairy whipping cream
3-4 tbs confectioners’ sugar, sifted
6 ounces cream cheese, at room temperature
½ cups salted peanut butter – crunchy or smooth
2 tablespoons milk

How To:

-Prepare a 7 inch springform pan.
-Put the Oreo crumbs and melted butter in a small bowl and stir with a fork just until the crumbs are moistened. Press the crumbs evenly over the bottom and up the sides of the springform pan (they should go up about 2 inches on the sides). Freeze the crust for 10 minutes.
-Bake the crust for 10 minutes in the 175C oven, then transfer it to a rack and let it cool completely before filling.
-Whip the cream until it holds medium-firm peaks. Scrape the cream into a bowl and refrigerate until needed.
-In another bowl beat the cream cheese with the confectioners’ sugar on medium speed until the cream cheese is satiny smooth. Beat in the peanut butter, chopped peanuts, chopped chocolate, coffee, cinnamon, nutmeg, and milk.
-Using a large rubber spatula, gently stir in about one quarter of the whipped cream, just to lighten the mousse. Then gingerly fold in the remaining whipped cream. Scrape the mousse into the crust, mounding and smoothing the top. Refrigerate for at least 4 hours, or overnight; cover with plastic wrap as soon as the mousse firms.
-To remove the pan: It’s easiest to warm the pan with a hairdryer and then remove the sides, but you can also wrap a kitchen towel dampened with hot water around the pan and leave it there for 20 seconds. Refrigerate until ready to serve.

How I love this cake!


I offered my husband to take a quarter of the already tiny cake to share with his friends in his office, there are only 4 people in his office, and he said a simple no way. He wanted to have them when he got back. I was thinking, “Yea, right. As if your daughter won’t finish them before you get home.”

The presence of the spice in the cake is actually what makes the cake so different with the ordinary cheese cake. The small amount of cream cheese mixed with the whipped cream also renders a mousse like sensation yet you can still taste the classic cream cheese flavor in it. So complex, yet it is so light and satisfying. I am thinking of making another batch but with homemade strawberry jam in place of the peanut butter so I could have a pink version or purple with blueberry jam. Oh, the possibilities!

Have fun making your cake and say no to overpriced who-knows-what-cheese-in-it store bought cheesecake!


Stumble Upon Toolbar Pin It

Saturday, January 7, 2012

Raspberry Semifreddo


The weather is not quite so friendly lately here in Jakarta. It would be blazing hot during midday and pouring cats and dogs in the afternoon till very late at night. Sometimes it is vice versa. When it is real hot, all I crave is just something that can shake off the heat and instantly makes me feel good. The thing about craving is that when the feeling comes and tickles your taste buds, it is able to mess around with your head in a strange pre-historic way and lets you think that you ought to get that certain food despite the time and place, now. Or you’ll be unleashing the dragon.

Okay, that dragon thing is out of context. Blame it on The Game of Thrones. I simply am addicted to the books and the tv series and my hubby seems to be on the same wavelength. We just found something that we both could enjoy together without him or me criticizing each other’s choice of books and movies. Back to the topic of craving, the hot midday and afternoon are quite suffocating for me. Trying to stay indoor doesn’t always help when what I want is to get my hands on cold desserts. The main problem is that I cannot find my ice cream maker anywhere. I know it must be somewhere inside those boxes that I haven’t unpacked, yeah..you got me there, and I’m talking about huge boxes that my hubby put really high on the top of shelves.

So I gave up on ice cream.

Granita?

Now, that would be a perfect idea if I do have the patience to mash the granita in the container with a fork for every two hours for at least four times. So what can I have to satisfy my cold desserts craving?

I did not know.

One night I was reading a Giada de Laurentiis cookbook before sleeping and found a luscious coffee semifreddo recipe. Why didn’t it occur to me? Yeah, easy to make and requires very little ingredients and utensils. As you know that I like to tweak a recipe here and there and make it my version, I decided to make a raspberry semifreddo, also for the lovely mere fact that I got loads of fresh organic raspberries in my refrigerator. Those are my daughter’s but I did not tell her that I used them to make this. The confession of crime could wait.


Semifreddo itself means half frozen but that does not mean it is rather liquidy like melted or unset ice cream. I remember when I was a little girl my mom and dad used to take me to this lovely gelatteria. The store itself was small, with only several white painted wrought iron sets of chairs and tables, there were grape vines dangling on the wooden beams which supported the not so high ceilings, synthetic of course but nevertheless very high in quality -the fake vines and the grapes looked marvelously real- or my dad would’ve given his endless comments about it, and it did add a classic Italian touch. Moreover, the gelatteria was really private and humble; it did not put such a big sign that advertise, "Oh, look! Here’s a place where you can buy ice cream." Gelato is not ice cream. I guess that was why I loved it so much, more for the humility and the privacy of the place, and the colorful layers of the cassatta. Not only gelato and cassatta, they also sold semifreddo and this spectacular Bomba Siciliana. It is not hard to make them as long as you have the patience and the passion. For now I’ll just share my semifreddo recipe.

Ingredients:
For the Semifreddo
-250 gr Raspberries
-1 cup heavy cream
-2-3 tbs confectioner sugar
-100 gr vanilla meringue, coarsely crushed
-3-4 tbs kirsch
For the coulis
-250 gr Raspberries
-2-3 tbs confectioner sugar
-1-2 tsp balsamic vinegar or lemon juice

Directions:
-Oil a loaf pan, line the bottom with parchment paper and set side.
-Puree the raspberries in a blender
- Whip the cream and the confectioner sugar until soft peak forms. Taste the sweetness; if you like it you can add more sugar.
-Fold in the raspberries, crushed meringues, and kirsch. (psst.. I added slightly more kirsch)
-Transfer into the pan, smooth the surface, cover with clingfilm and freeze at least 6 hours.
-Meanwhile, make the coulis. Puree the raspberries and press them on a fine sieve to get a lovely smooth texture. Stir in the confectioner sugar, taste the sweetness; if you like it you can add more sugar. Flavor the coulis with balsamic vinegar or lemon juice.
-Serve the semifreddo with the coulis. Voila!

Note:
You can substitute raspberries with any berries you like. Be creative, this is a foolproof dessert so there is no way you can go wrong. If you want to make a vegan version, simply substitute the heavy cream with non-dairy whip cream and skip the liquor if you want to make it non-alcoholic version. As for me, kirsch augments the flavor of almost every spring and summer fruits. I happen to have some meringue in my air tight jar that I made about a week ago. You can cheat and use store bought meringue but be forewarned, store bought meringue is often times too sweet. So, check the sweetness, if it is quite sweet then completely reduce the amount of the confectioner sugar in the semifreddo mixture or don’t use any sugar at all.


There you go, my take on semifreddo.

I sincerely hope you would try to make this recipe at home. The reason is very simple. If you have kids, you might want to watch their ice-cream intake. I mean, children and ice cream are inseparable, so the challenge is how to make it healthier so they can still eat it a lot and us parents don't have to worry about a thing. Lots of famous premium ice creams sold out there are heavenly, utterly delicious but they contain too much egg yolks. If they don’t use yolks, like other generic brands of ice creams, the amount of sugar is despicably insane, so insane you’ll get a cough after a scoop or two. I’ll be posting my easy ice cream recipes and frozen yogurts, yolk-less, soon and till then, have fun with your semifreddo.

Ciao!


Stumble Upon Toolbar Pin It

Friday, October 14, 2011

Seriously Healthy Brownies

Brownies.

What comes to your mind when you hear that word?
Love, chocolate, heaven, bliss, divine, comfort, true friend, the list could go on forever and I bet the word ‘sin’ will come up in that list. Yes, buttery, chocolatey brownies with oozing marshmallow is a true food for the heart. A tolerable sin.

Brownies have become the staple of women’s comfort food and you don’t need to have a broken heart or a problem to enjoy its blissful taste. You just give it to yourself as a simple reward for a day well spent.

But what if you happen to be watching your weight or you want to have a better health by consuming healthier food and still want to eat brownies? Sure you can. Just treat yourself with a bite. Oh, who are we kidding here? Who would only eat one bite? Unless the brownies ain't yummy. Me, I’d take the whole pan for myself.

My love for brownies, I find it cannot top my love for my family’s health. So I’m wrecking my brain to find a formula for heart friendly brownies. Admit it we shall that a cup of butter mixed with almost half a dozen of eggs, loads of sugar, and melted chocolate are not how you should express your true love to your family especially your kids. So I’m trying to cut those without sacrificing the purpose of eating brownies; Happiness in a bite.


Here is my take on brownies. It is BUTTER FREE, using ONLY WHOLE WHEAT FLOUR, and YOLK FREE. Satisfied? No..I am not easily satisfied, I take things personally. I mix chunks of steamed APPLE in this brownies to add more fiber. The chocolate that I use is purely high quality dutch-processed cocoa powder not chocolate bars nor cooking chocolate. So you can be sure when I say butter free, it’s totally butter free.

Order now!
30x10cm for only Rp75.000
(The topping is almond and chocolate chip, you can have both, omit one, or plain.)
Note: Best eaten cold so keep it refrigerated.

Stumble Upon Toolbar Pin It

Friday, June 24, 2011

Low-Fat Apple Pie


I'm a fool for pies.
I can't say no.


Some of my friends asked me why didn't I sell pies.
The answer was actually very simple. To make a great pie, we cannot use disposable aluminium pan like when we want to bake and give dishes such as macaroni schootel. The bottom crust will just not as evenly baked as when we use glass pan or teflon or tin. So why not just sell it along with the pan?


That is the --perhaps not so important-- background story of this divine apple pie.
Now let's get down to the real deal *drooling because of the picture*.
The thing about pie is that the crust is always too fatty.
Oh, I LOVE buttery crust. It's the best thing since the invention of telephone.
But, these are the times of being health conscious and though I love that flaky, buttery crust, I must cut down on the fat for my sake and the people I love.


The crust of this apple pie is made Low-Fat, I do not use butter for the crust. But you can be sure it's not a problem and you won't miss the fat J
It looks elegant, and it is MaMiko's premium product.
Why?
Because it is perfect as a gift for special occasion such as Idul Fitri, Christmas, family gathering, etc. It is also very lovely to be given as a present for your child's teacher, neighbor, co-worker or supervisor in your office, or just simply have it for YOURSELF J


Sold together with the tin pan, this elegant and devilishly divine Low-Fat Apple Pie is 22cm in diameter.
Rp175.000 for a pan of apple heaven.


Stumble Upon Toolbar Pin It

Tuesday, June 7, 2011

Apple Strudel


OLD SCHOOL.
Yup. I don't need to explain much about this apple strudel. Using the freshest apples and spiced well with cinnamon, it is a favourite dessert for people young and old. 
If you happen to have some vanilla ice cream at home, go ahead and make your day!
But if you don't.. this apple strudel is healthy and delicious to be eaten just as is.


Apple strudel. 15x30cm Rp60.000 Stumble Upon Toolbar Pin It